
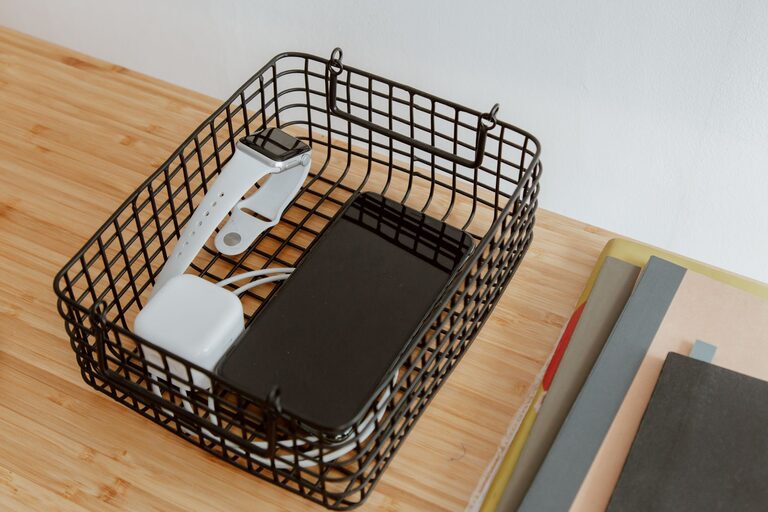
A charging station gives every device a dedicated place to recharge. Instead of searching for open outlets or untangling cables, you can keep phones, tablets, watches, earbuds, cameras, and other electronics together in one organized area.
The best charging station does more than reduce clutter. It also helps you use the right chargers, protect your devices, and keep cables from becoming a daily nuisance. With a few simple choices, you can create a setup that fits your space and routine.
Choose the Right Location
Start by choosing a convenient location near a wall outlet. A desk, entryway table, kitchen counter, nightstand, or shelf can work well. Think about where you usually set down and use your devices.
A good location should be:
– Easy to reach
– Close to a suitable power outlet
– Large enough for your devices
– Away from water and excessive heat
– Clear of walkways where cables could cause trips
– Convenient for checking devices while they charge
Avoid placing the station in a cramped area where chargers and devices could become covered by clothing, paper, or other items. Electronics need airflow, especially when several devices are charging at once.
If you have children or pets, consider a location that is out of reach or use cable covers to reduce loose cords.
Decide Which Devices Belong There
Before buying accessories, make a list of the devices you want to charge. Common items include:
– Smartphones
– Tablets and e-readers
– Smartwatches
– Wireless earbuds
– Cameras
– Portable game systems
– Headphones
– Rechargeable batteries
– Fitness trackers
Knowing how many devices you need to charge will help you choose the right size station. If you only charge one or two items, a small tray and a multiport charger may be enough. For a larger household, consider a charging organizer with separate slots for each device.
It is also helpful to decide whether the station is for one person or the whole household. A shared station may need labels, extra cable length, and more space between devices.
Select a Power Solution
Most charging stations use either a multiport wall charger, a power strip, or a combination of both.
A multiport charger is useful when several devices charge through USB cables. It keeps the setup compact and reduces the number of bulky plugs. Check the charger’s specifications to make sure it provides enough power for your devices.
A power strip can be helpful when you need to plug in larger adapters, such as those used for laptops or cameras. Choose a reputable model with built-in safety features, such as overload protection. Avoid connecting one power strip to another, since this can create unnecessary electrical risks.
When selecting a charger, look for:
– Enough ports for your devices
– Compatibility with your charging cables
– Support for the required charging standards
– A reputable brand and clear safety information
– A power rating suitable for the connected devices
Do not force a connector into a port, and avoid using chargers or cables that show damage. Frayed wires, bent connectors, loose plugs, or cracked housings are signs that an accessory should be replaced.
Organize the Cables
Cable management is one of the most important parts of a charging station. Without it, even a neat setup can quickly become tangled.
Use cable clips, adhesive cable holders, hook-and-loop straps, or small cable sleeves to keep cords in place. Route cables along the back or underside of the furniture when possible. Leave enough slack to pick up each device without pulling on the connector.
Helpful cable organization ideas include:
– Assigning one cable to each charging position
– Labeling similar cables at both ends
– Using different colors for different devices
– Keeping extra cable length tied neatly
– Storing rarely used cables in a small box
– Routing cords away from drawer edges and hinges
Avoid tightly wrapping cables around the charger or bending them sharply near the connector. Gentle curves help reduce wear over time.
Add a Tray or Charging Organizer
A tray can give your charging station a defined footprint and prevent devices from spreading across a desk or counter. Look for a tray with enough room for the devices you use most often.
A charging organizer with slots is useful when several people share the station. Each device can have its own position, which makes it easier to see what is charging and who it belongs to.
Choose a material that is stable and easy to clean. Wood, plastic, metal, and fabric organizers can all work well. If you use a metal tray, make sure exposed metal will not damage devices or create contact with loose electrical parts.
For a simple setup, you can place a small tray next to a multiport charger and use cable clips along the rear edge. This creates an organized station without requiring a large piece of furniture.
Check Compatibility Before Connecting Devices
Not every charger or cable works equally well with every device. Check the original instructions or the manufacturer’s specifications when you are unsure.
Pay attention to:
– Connector type, such as USB C, USB A, or a proprietary connector
– Required power input
– Fast charging support
– Data versus charging cables
– Device-specific charging accessories
A cable may fit physically but still charge slowly or fail to support certain features. Keep cables that serve different purposes clearly separated. For example, a cable used for data transfer may be different from one intended only for charging.
For devices with removable batteries, use the charger designed for that battery type. Avoid mixing chargers unless the manufacturer states that they are compatible.
Improve Safety and Ventilation
Keep the charging station dry and well ventilated. Do not cover chargers with blankets, clothing, books, or other materials. Avoid charging devices on soft surfaces that can trap heat, such as beds or couches.
Inspect the station regularly for:
– Damaged cables
– Loose outlets or plugs
– Overheating adapters
– Dust buildup
– Devices that charge inconsistently
– Cords that create a trip hazard
If a charger becomes unusually hot, makes a buzzing sound, smells unusual, or shows visible damage, disconnect it and stop using it. Replace questionable accessories with quality products from reliable manufacturers.
Keep liquids away from the station, and avoid placing it directly beside a sink or other source of moisture.
Make the Station Easy to Use
A charging station works best when it matches your daily habits. Keep frequently used devices in the easiest-to-reach positions. Place less frequently used accessories in a nearby drawer or container.
You can also create simple routines:
– Return each device to the station when you are finished using it
– Plug in devices at a consistent time each day
– Unplug items that do not need to remain connected
– Check the station weekly for clutter or damaged cables
– Keep one spare compatible cable available
If you often take devices with you, leave enough room to unplug them without disturbing the rest of the setup. A small basket beside the station can hold travel chargers, power banks, or adapters.
Maintain the Charging Station
Once your station is set up, maintenance should be simple. Dust the area regularly and check cable connections every few weeks. Remove cables for devices you no longer use, and update the layout when your equipment changes.
A well-designed charging station should save time rather than create new work. Keep only the accessories you need, use clear labels when helpful, and adjust the setup as your household’s charging needs change.
With the right location, compatible equipment, organized cables, and basic safety practices, a charging station can make your home or workspace tidier and your daily routine more convenient.
